This page describes the Political and Military thinking behind the Battle of the Dunes
The Battle of the Dunes is a little known battle that took place near the beach at the northern edge of the front line at a place called Nieuport.
Nieuport is north east of Dunkirk and close to the border between Belgium and France. The Yser river and the Yser canal run from the Flanders area of France and into Belgium north east of Nieuport and on to the sea.
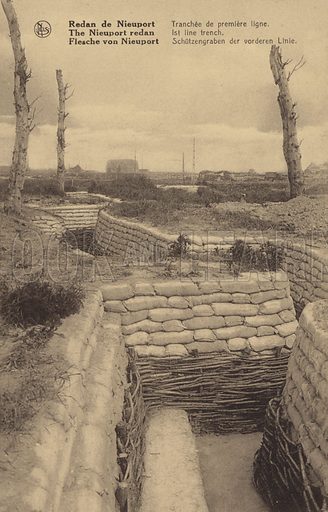
This extreme western end of the front line is sand dune terrain.
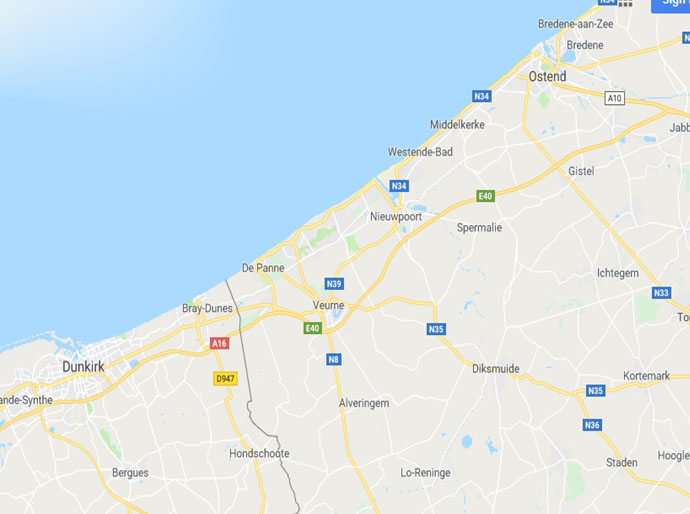
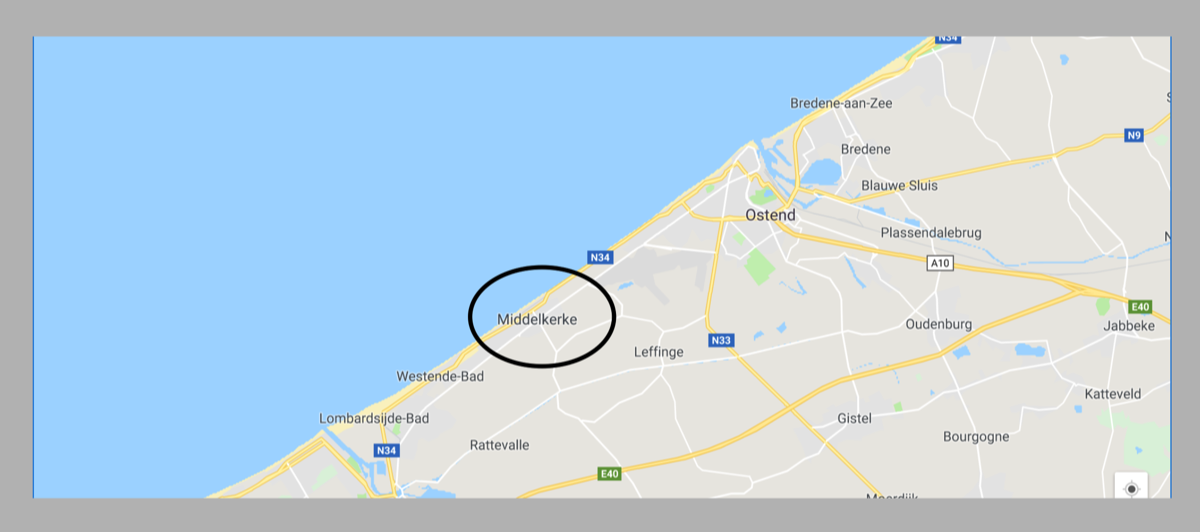
Nieuwpoort, Belgium (Modern map)
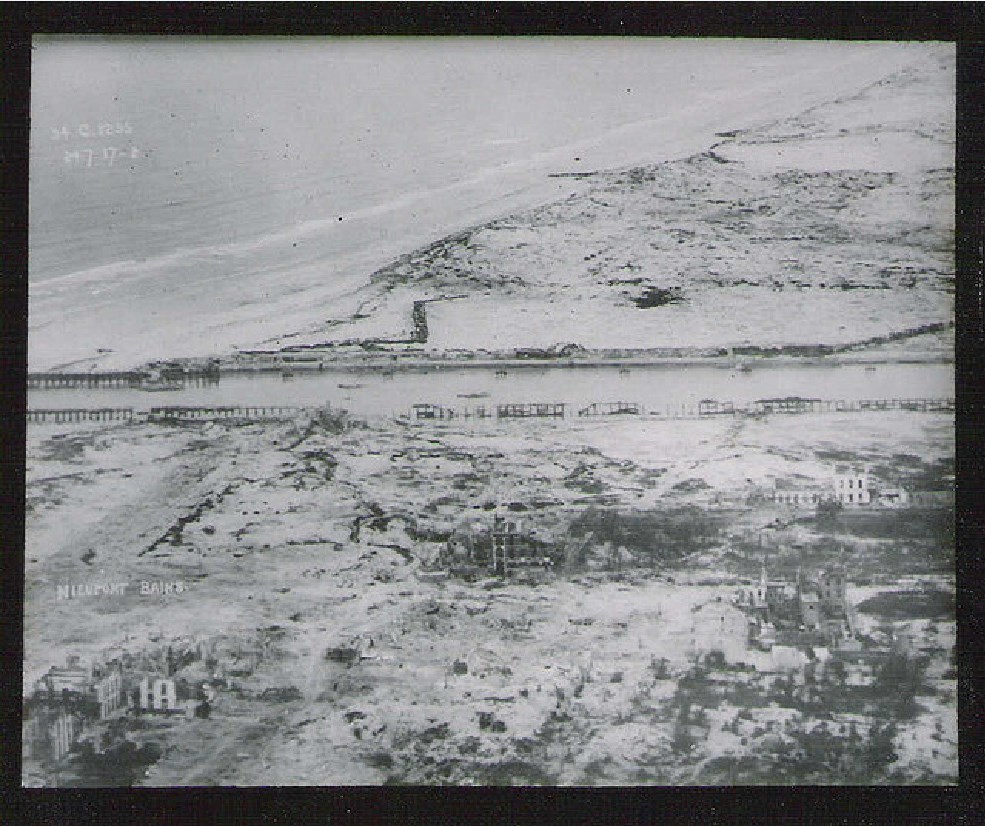
Above - Aerial view of Nieuport, 1917, showing the extent of damage
Below - The dunes, with barbed wire stakes and hurdles

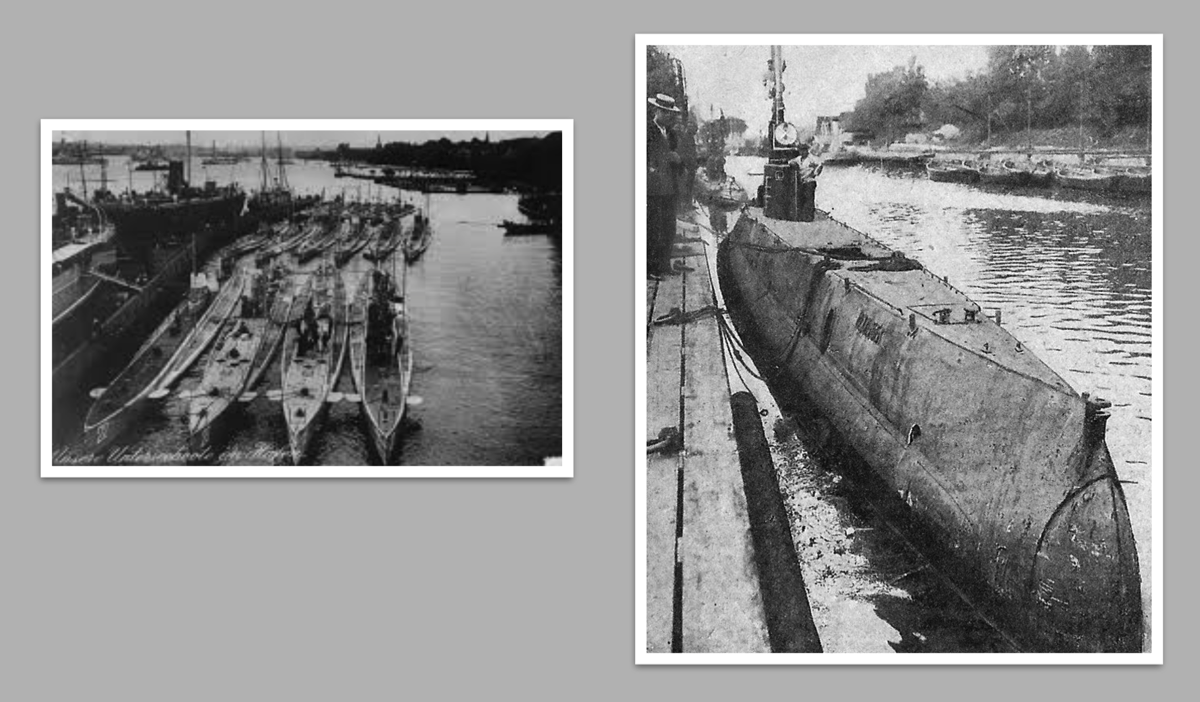
At the beginning of the war the German submarines were based in Ostend, Zeebrugge and Bruges and were threatening the British supply routes to France so the generals needed a plan to prevent this.
There was a suggestion of bombing from the sea, but the German artillery around Ostend was too heavy. Air bombardments were also disregarded for similar reasons.
In 1916 the Army and the Royal Navy decided to set up a landing on the beach of Ostend with planned diversion manoeuvres at Zeebrugge and Middelkerke but the landing was called off because the Battle of the Somme had started on 1 July that year and there would not have been enough man power to spare.
In 1917 the Royal Navy came up with another plan that was smaller-scale which was to just target Middelkerke.
The landing was planned to coincide with an offensive from Ypres in the July (this was the third battle of Ypres). They calculated that Ypres would exhaust the Germans and therefore give the British the edge, so the sea attack was planned for 8 August.
The plan was for naval landings to be supported by a breakout attack by the army from Nieuport and the Yser bridgehead and was to be known as Operation Hush.

In preparation for this the British army took over the Nieuport bridgehead from the French Corps on 20 June 1917.
The 2nd Battalion Kings Royal Rifle Corps set off on 20th June to march the 27 miles from Meteren to Nieuport where they started training on the sand dunes.
It was difficult terrain and, not helped by the British trenches being constructed in sand and therefore would easily collapse under heavy bombardment.
(Right - Newly-constructed trenches)
In preparation for the landing forces the Navy started building three huge pontoons, each 700 feet long, with supporting artillery, tanks, motor machine guns, cyclists and trench mortar batteries.
Each pontoon was to be pushed along by two monitors, which would also be tasked with attacking shore positions during the landing.
The whole landing was to be screened with smoke from eighty boats, each with three burners, and a total of fifty tons of phosphorus.
The army started improving the defences in the bridgehead by digging tunnels across the area. These were constructed by the 2nd Australian Tunnelling Company.
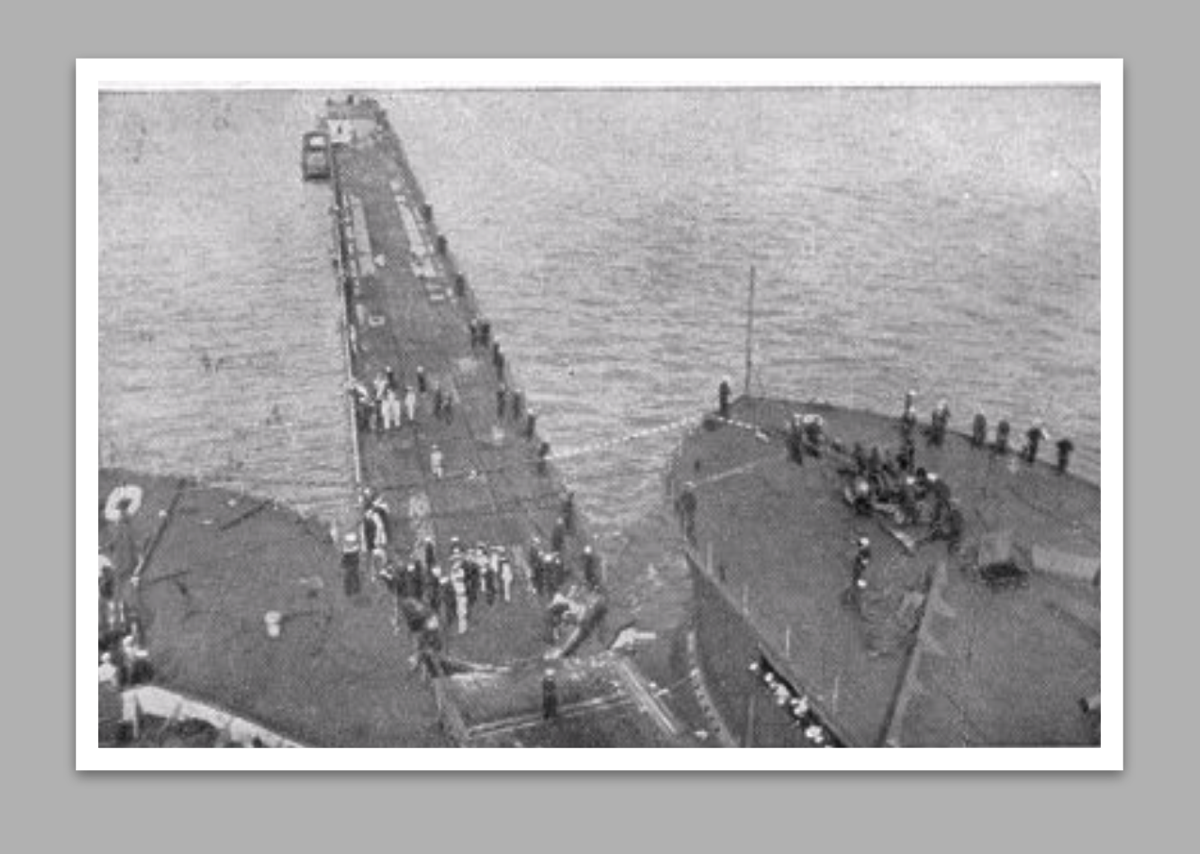
Above - Operation Hush pontoons
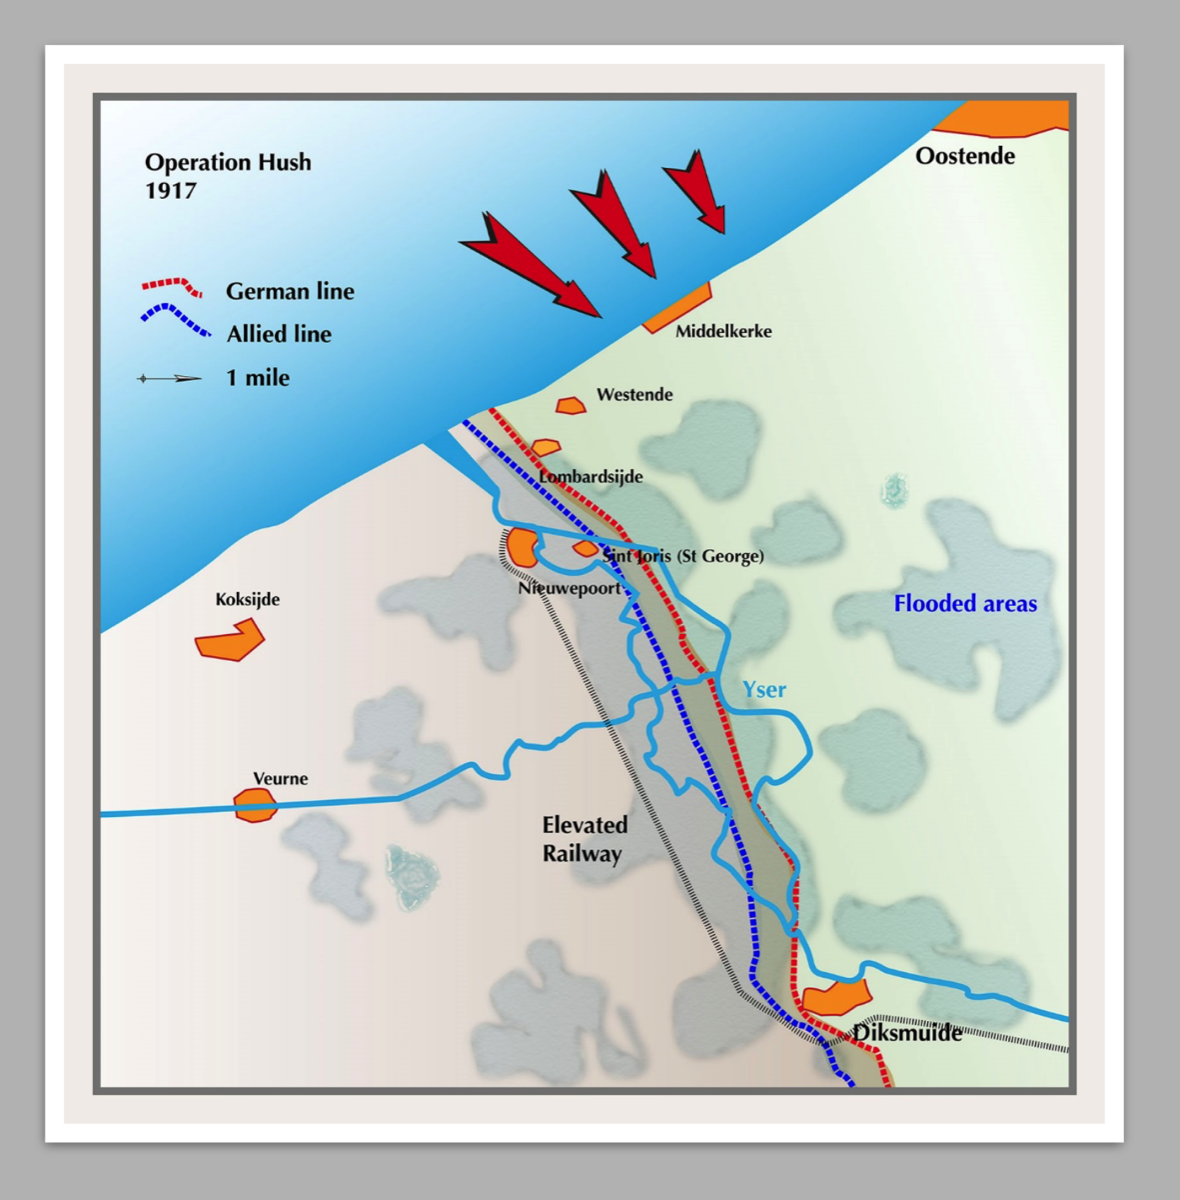
Right - Operation Hush beach assault plan
But by the beginning of July only 176 of the planned 583 guns and howitzers were ready to defend the bridgehead and the artillery was not yet fully in place notwithstanding this the plan still went ahead. The British artillery had received orders to fire as little as possible for fear of warning the Germans.
The British Generals were somewhat naïve in thinking that the Germans would not be prepared for an attack.
They had built 24 coastal batteries, including eight large calibre naval gun batteries capable of engaging ships up to 30 kilometres off the coast. A line of trenches and wire extended along the coast, supported by 33 concrete machine gun nests spaced every 1,000 metres.
Their operation was known as Operation Strandfest. (which, ironically, translates to Beach party)
Fog and low cloud had prevented the Allies seeing the German build-up, which meant that the naval operation never had a chance to happen because on the 6 July 1917, the German Marine Corps began an artillery bombardment, which continued for the next four days.
The British air force had also been given orders not to disclose its strength and so the German Aircraft had freedom of the skies.
This account of the battle is taken from the war dairies of the 2nd Battalion Kings Royal Rifle Corps.
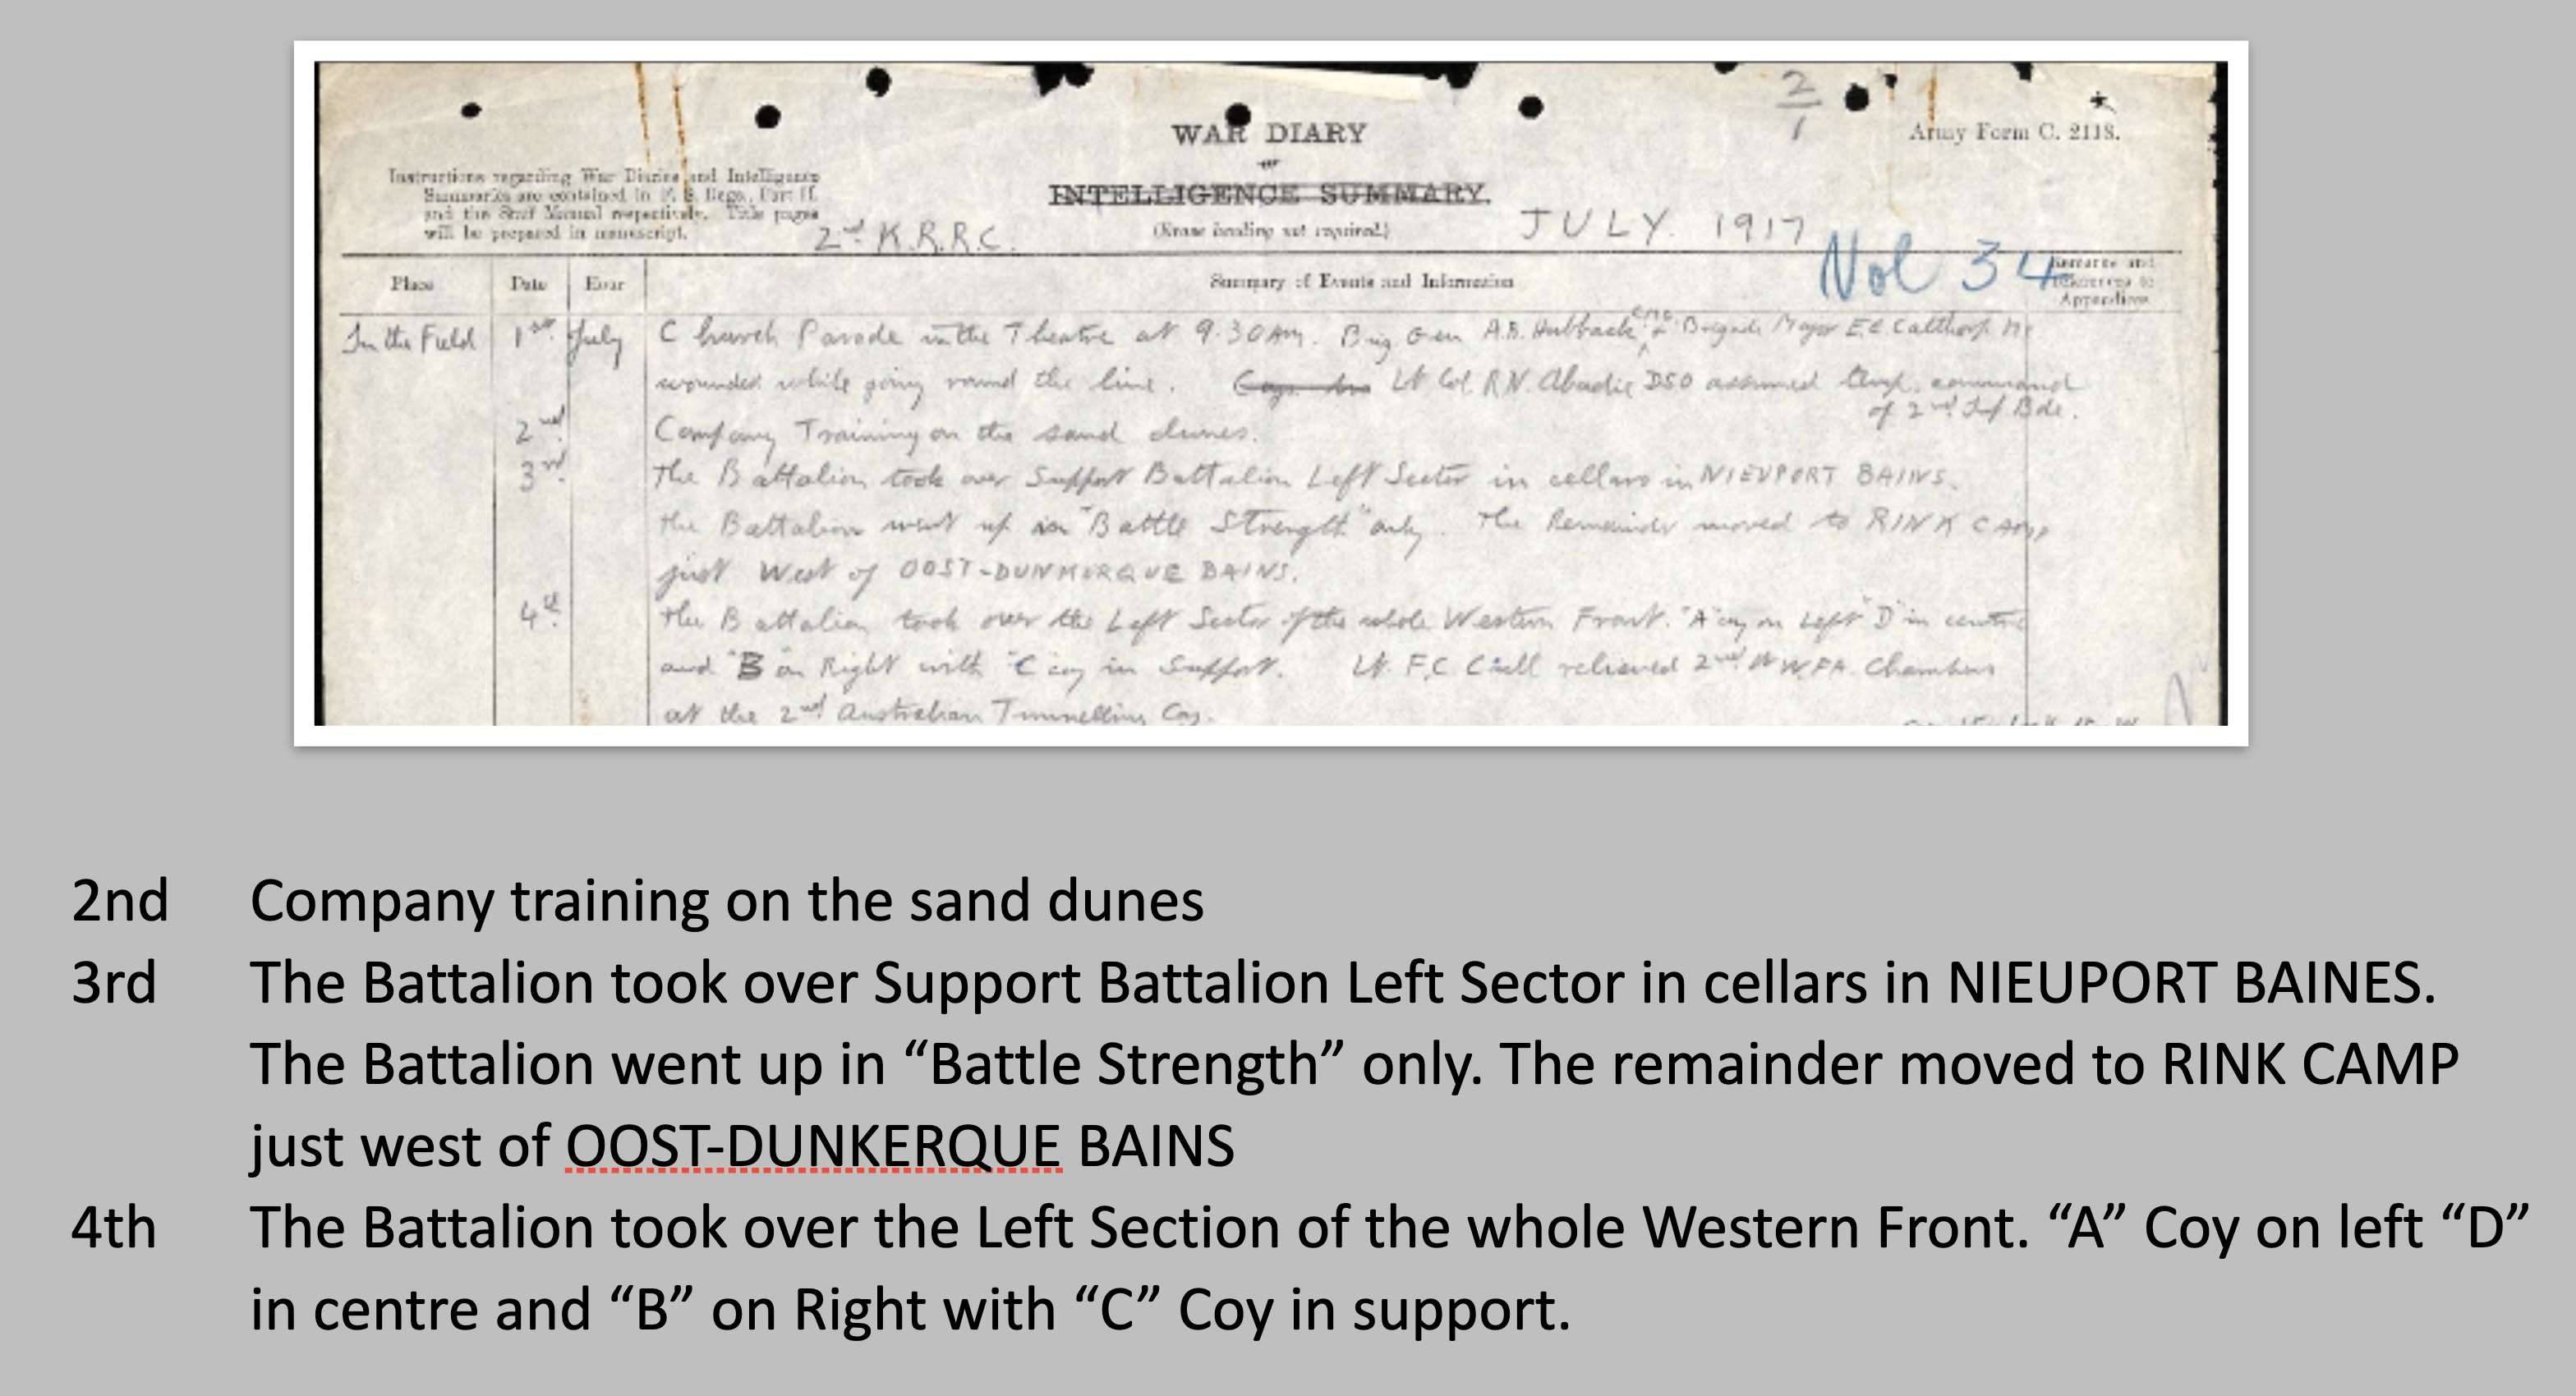
2, 3 & 4th The Battalion took over the left section of the whole western front, with the 1st Northamptonshire Regiment to their south.
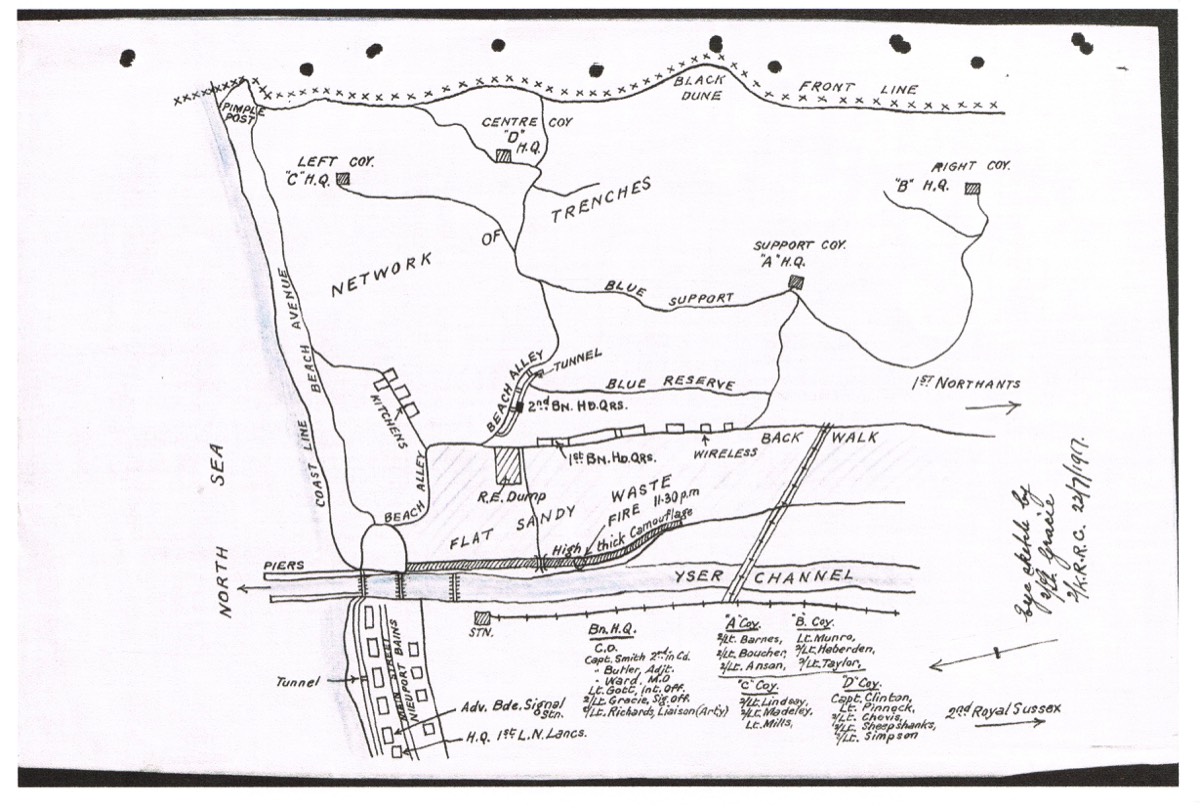
This map of the area (see below) was drawn by 2nd Lt Gracie after the battle, on 21 July 1917. It shows the location of the various companies of the KRRC.
On the left of the line, overlooking the North Sea, "C" Company was posted, near a projection known as Pimple Point.
"D" Company took the centre. "B" Company on the right and "A" Company was in support, its Headquarters being in a central position forming the apex of a triangle of which D and B Companies were the base.
Battalion HQ and the Dressing Station were established in a central position some 350-yds in rear of the front line.
Close by was an unfinished underground tunnel, running east and west, something over 100-yards in length.
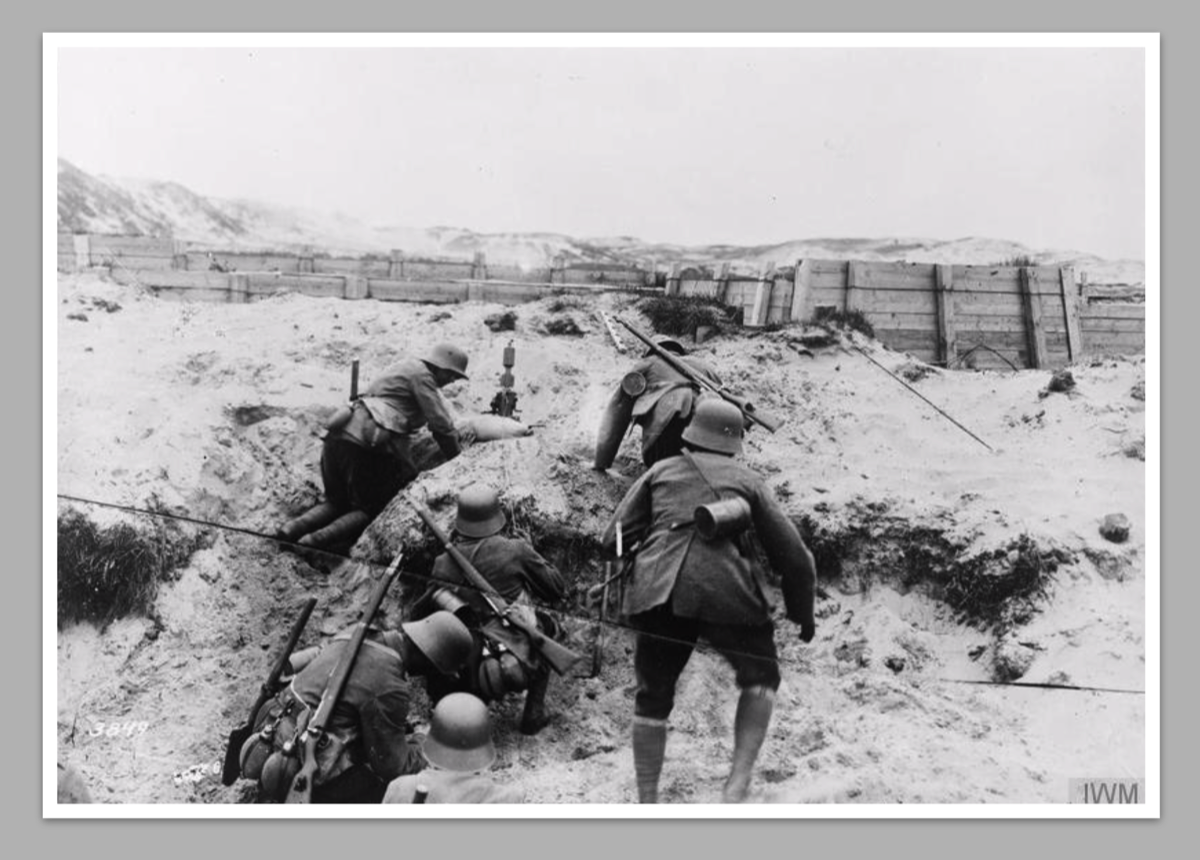
The Germans had started small minenwerfer bombardments on 6th July and the attack increased progressively through the next few days. (Minenwerfer were short-range mortars used by the German infantry)
On the 9th a party of Rhodesians were sent to raid the enemy trenches. (The Rhodesians mentioned were members of the Rhodesian Amy that had been merged with the British Army at the start of the war. A platoon of Rhodesians were part of “B” company)
At 5.30am on the 10 July the massed German artillery, including three 9 inch naval guns, in-shore batteries and 58 artillery batteries really opened up on the British positions in the bridgehead.
To add to the difficulties the telephone communication lines had been cut and so the only way the companies and HQ could communicate was by pigeon.
The bombardment continued throughout the day. The British artillery attempted a counter-barrage but several of their guns were knocked out and the German infantry were well protected.
There were lulls in the attack between 9:45 and 9:50 and again between 1:55 till 2:10 but from just after 2pm the bombardment was continuous.
Below - Minenwerfer (trench mortar) and crew
All but one of the bridges over the Yser River were demolished, isolating the 1st Division, which included the 1st Northamptonshire and 2nd battalion KRRC on the extreme left flank.
Map Enemy curtain fire made it impossible to guard the beach. The attack was simultaneous from the front and rear (via the beach). The first news to reach Battalion HQ was the appearance of the enemy in a communication trench, which ran parallel to the tunnel. Enemy bombs were thrown down the air holes into the tunnel and flame throwers attacked the dugouts.
Colonel Abadie (O/C KRRC) made for the east entrance of the tunnel to make a last charge in the open air, ordering a party to follow him. However the tunnel was narrow and cluttered with men and ammunition boxes and movement was slow, the colonel was last seen by the Australian tunnellers firing his revolver killing five Germans, before he was killed himself just before the tunnel entrance was blown in.
Officers and men remaining in the tunnel tried to clear the entrance to join the counter attack. They came to the conclusion that there was a slight chance of escaping back to the Yser and then swimming to safety. These were the only men that managed to escape.
In total, four officers and fifty-two NCOs and men of the KRRC managed to get back across the river. 70 – 80% of the battalion were lost.
The Northamptonshire regiment, who were operating closely with the KRRC was virtually wiped out.
The walking wounded from the dressing station tried to escape but were obviously unable to do so and were taken prisoner.
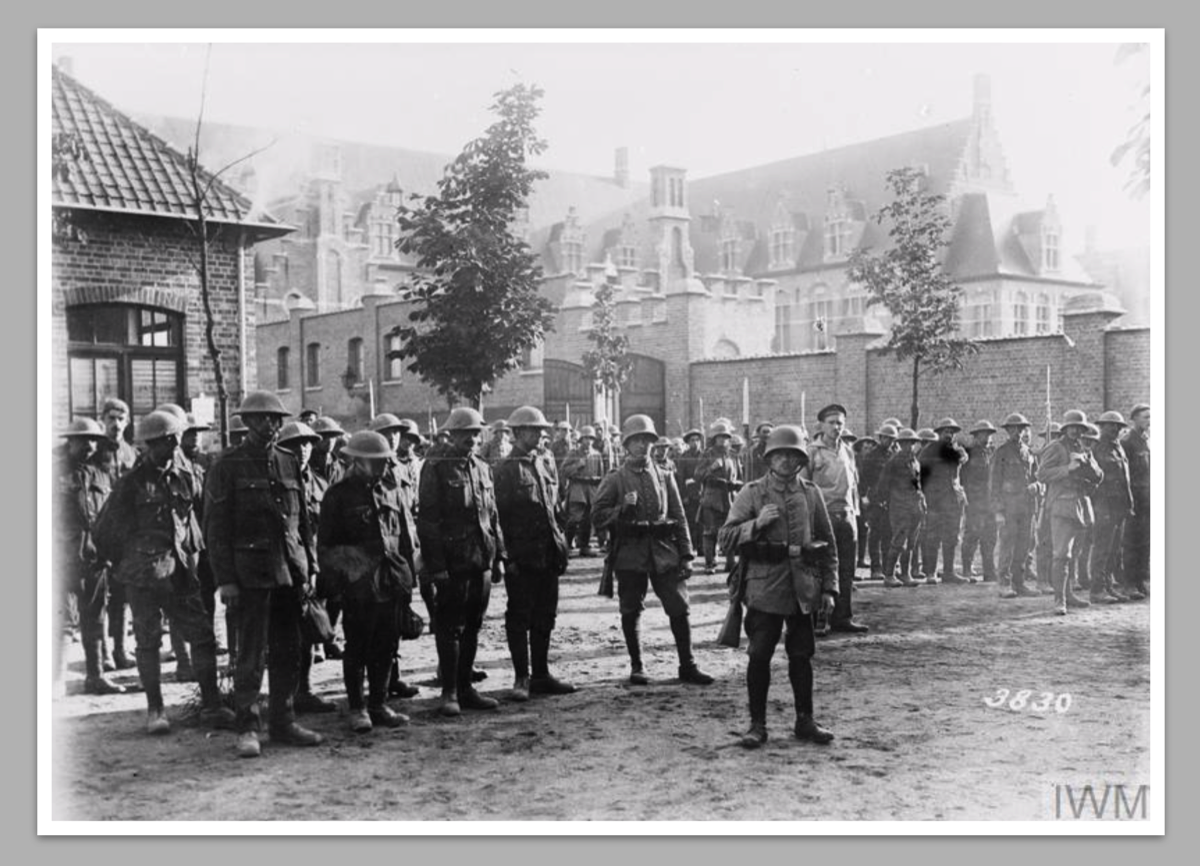
The total British casualties amounted to approximately 3,126 of all ranks, killed, wounded and missing.
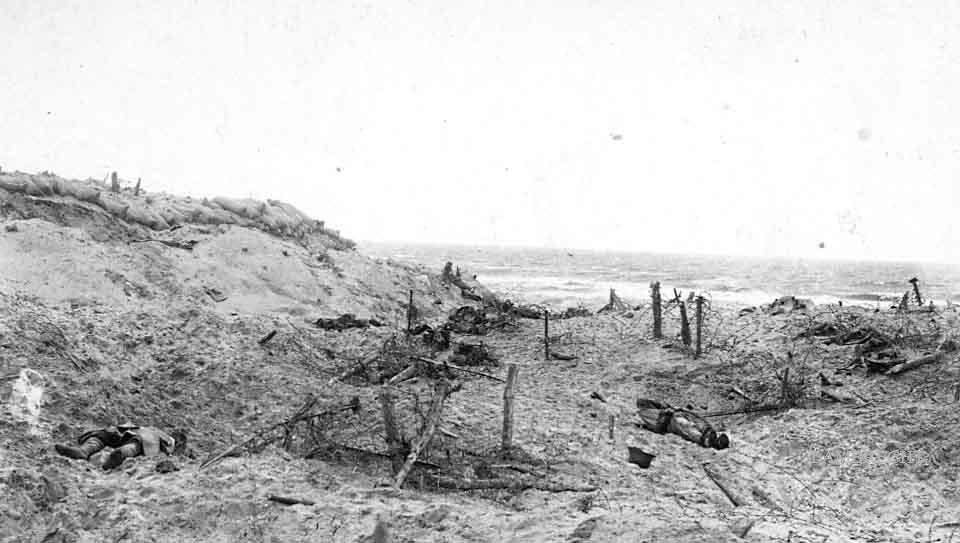
Above and below - After the battle